Page History
...
This document describes how a robotjob (change) request can be created.
A Robojob Robotjob Ticket can be created via the following two options
- Via Create button, via this way a ticket can directly be created for a RobotJob Change
- Via Customer portal requesting a new ticket for one of the below options or for a existing Servicedesk ticket.
- Question (Service request)
- Issue/problem (Incident)
New
...
Robotjob ticket via Create button
- Via Create button, select Issue Type RobotJob Change
Note: This option is only available for users who are member of licensed group: YMEUACJiraServiceDeskUsers.
- A new screen will be opened where you can enter the ticket details:
a. Add text to the Summary, Description fields
b. Select Solution group: Business Applications (ITS Support)
c. Select Application Module: YMPACT
d. If available include screenshots/attachments to the ticket
e. Press Create button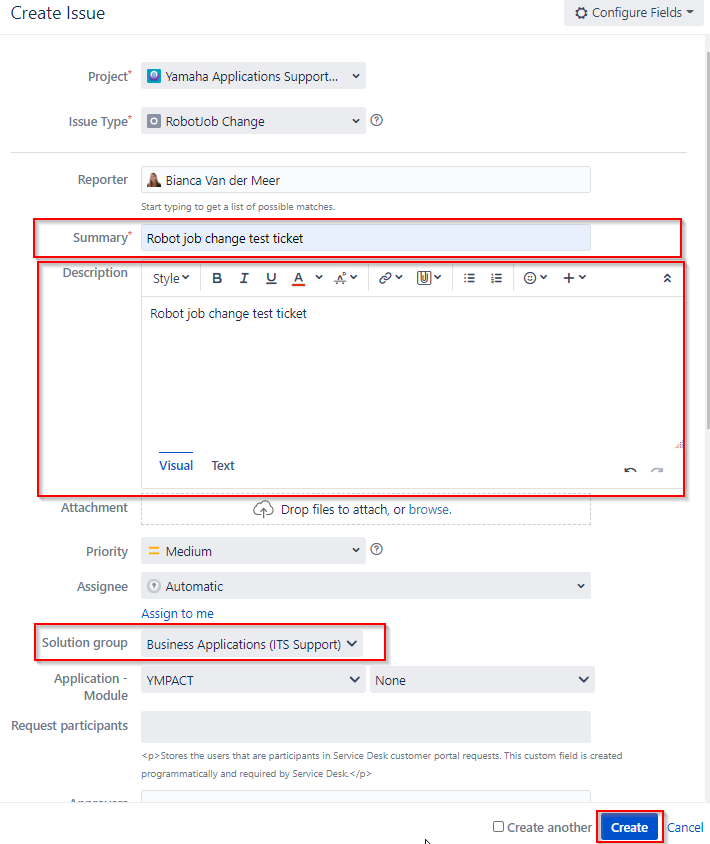
- The requester will receive a notification per mail with the ticket number or check the Queue for open tickets.
Open the newly created for Type Robot Job Change ticket
- Allocate the ticket to yourself
a. select assign to me
b. Click on the Allocate button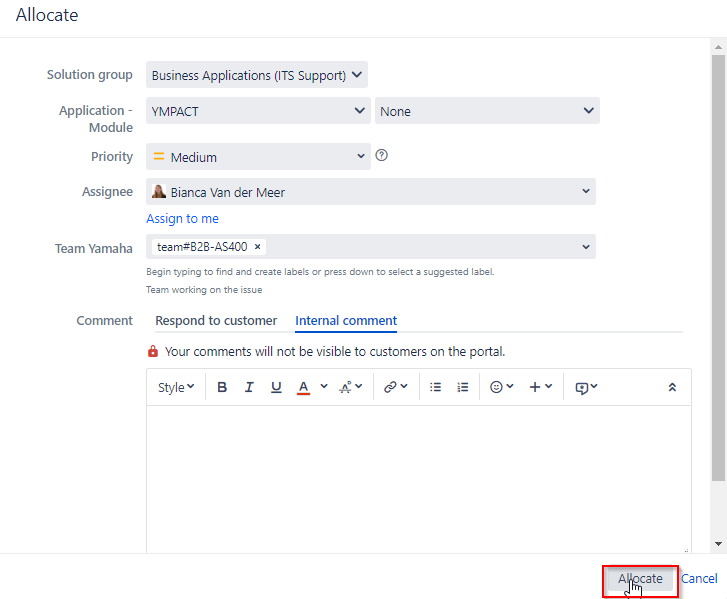
- Click on Start Progress

- Next steps see from step 9. in below overview: New Robojob request via new ticket or for a existing ticket
Press Req. SQL or RoboJob approval
René: Description can be manually filled, should this not have similar Description template as used when creating Robotjob change request via a existing ticket (step 8) ?
Then step to create new ticket with same request type can be skipped. Other wise this option is will be not add something to use it.
New Robojob request via new ticket or for a existing ticket
- Create a new ticket via the Customer portal Go directly to URL: https://support.yamnet.com/servicedesk/customer/portal/ or select Raise a request in the servicedesk menu.
For requesting a RoboJob change in a existing ticket Step 1 and 2 can be skipped.
- Select I have a question (Service request) or I have an issue/problem (Incident)
Fill the following selection:
a. Add text to the Summary, Description fields
b. Select For Who is this request: Business Applications (ITS Support)
c. Which application does it concern : YMPACT
d. If available include screenshots/attachments to the ticket
e. Click on Create button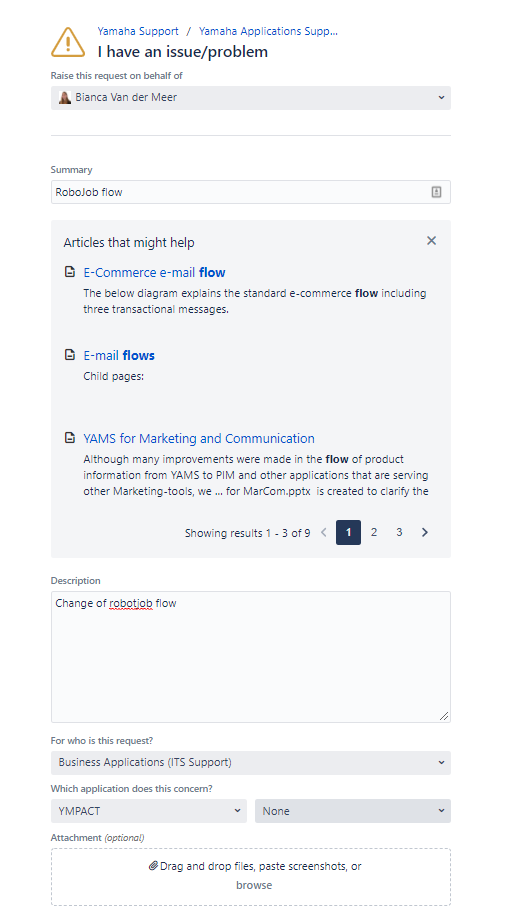
- When ticket is created, open the ticket in the Yamaha Applications Support Desk
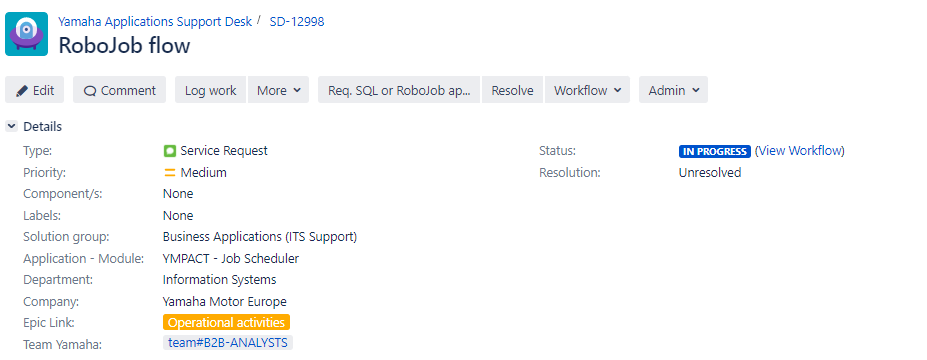
- Select Workflow , then select Create Robojob Approval

- It immediately creates a LINKED (implemented by) new ticket until status In Progress + the reporter and assignee prefilled.
Description will be copied from the original ticket.
Press Create Robojob Approval ticket.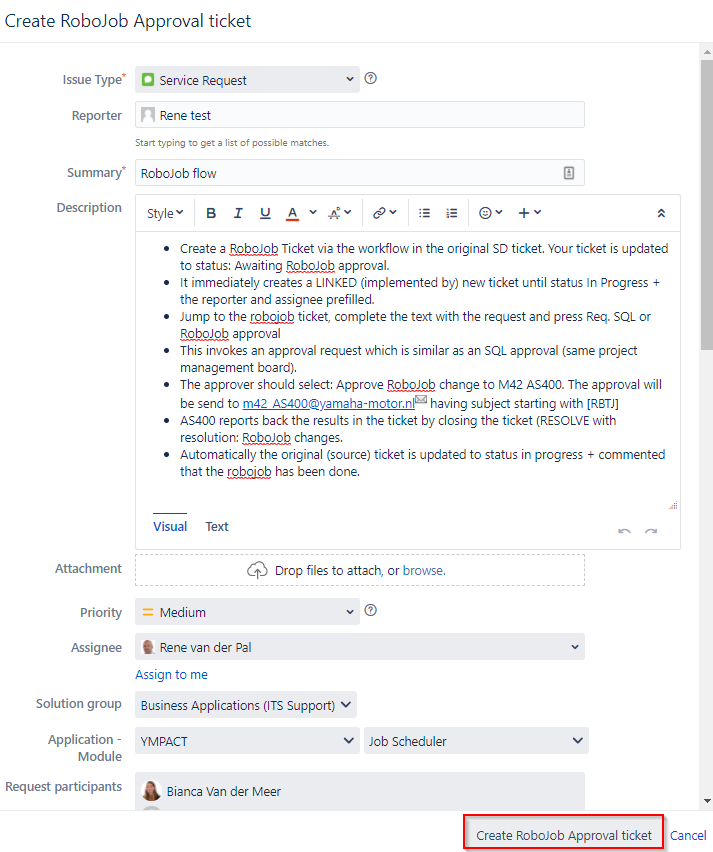
- The original ticket is updated to status: Awaiting RoboJob approval.
Jump to the robojob ticket which can be found under Issue Links - Is implemented by section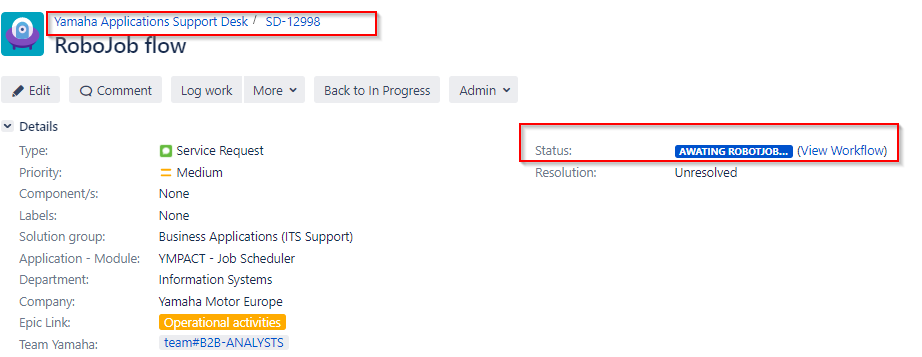
- Jump to the robojob ticket

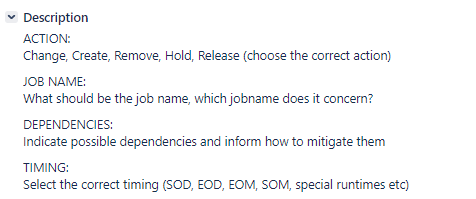
- Complete the text in the description area
- Press Req. SQL or RoboJob approval
This invokes an approval request which is similar as an SQL approval, ticket status will be changed to Awaiting manager approval
- The approver should select: Approve RoboJob change to M42 The approval will be send to m42_AS400@yamaha-motor.nl
 having subject starting with [RBTJ]
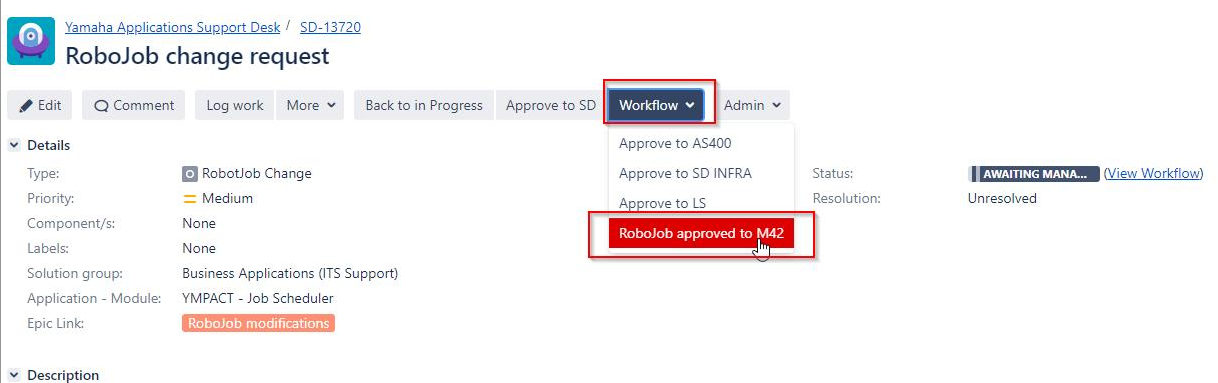
- AS400 support reports back the results manually in the ticket by leaving a comment.

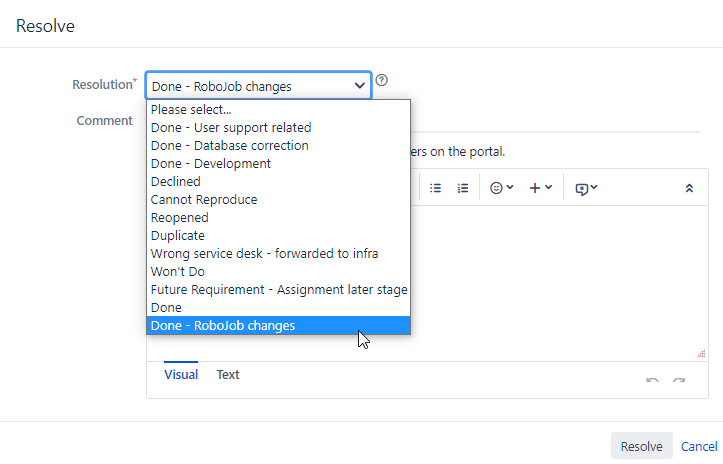
- AS400 support will close the ticket via the Resolve button, select resolution Done- Robojob changes

- Automatically the original (source) ticket is updated to status in progress + commented that the robojob has been done.
Overview
Content Tools