Page History
Introduction
This document describes how a robotjob (change) request can be created.
A Robotjob Ticket can be created via the following two options
- Automated: Out of an existing SD ticket (preferred)
- Manually: Via the Create button, via this way a ticket can directly be created for a RobotJob Change.
(Only to be used if there is no ticket from where you need to record a robotjob change)
New Robotjob request out of an existing ticket
- Open the ticket in the Yamaha Applications Support Desk
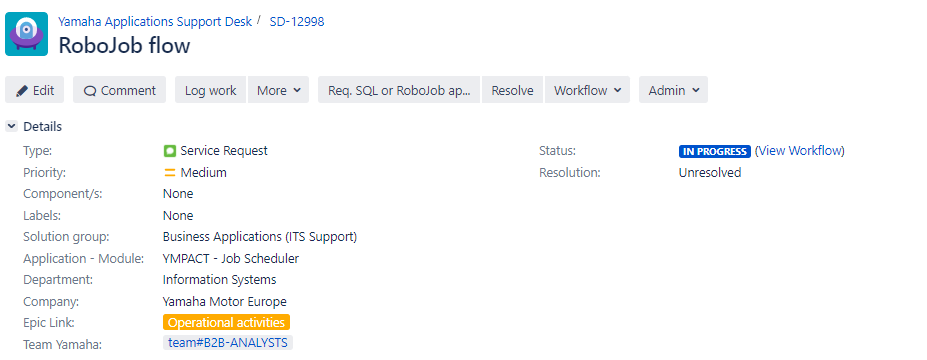
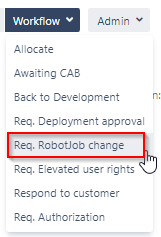
- Select Workflow , then select Req Robotjob change
...
- It immediately creates a LINKED (implemented by) new ticket until status In Progress + the reporter
...
- + assignee prefilled.
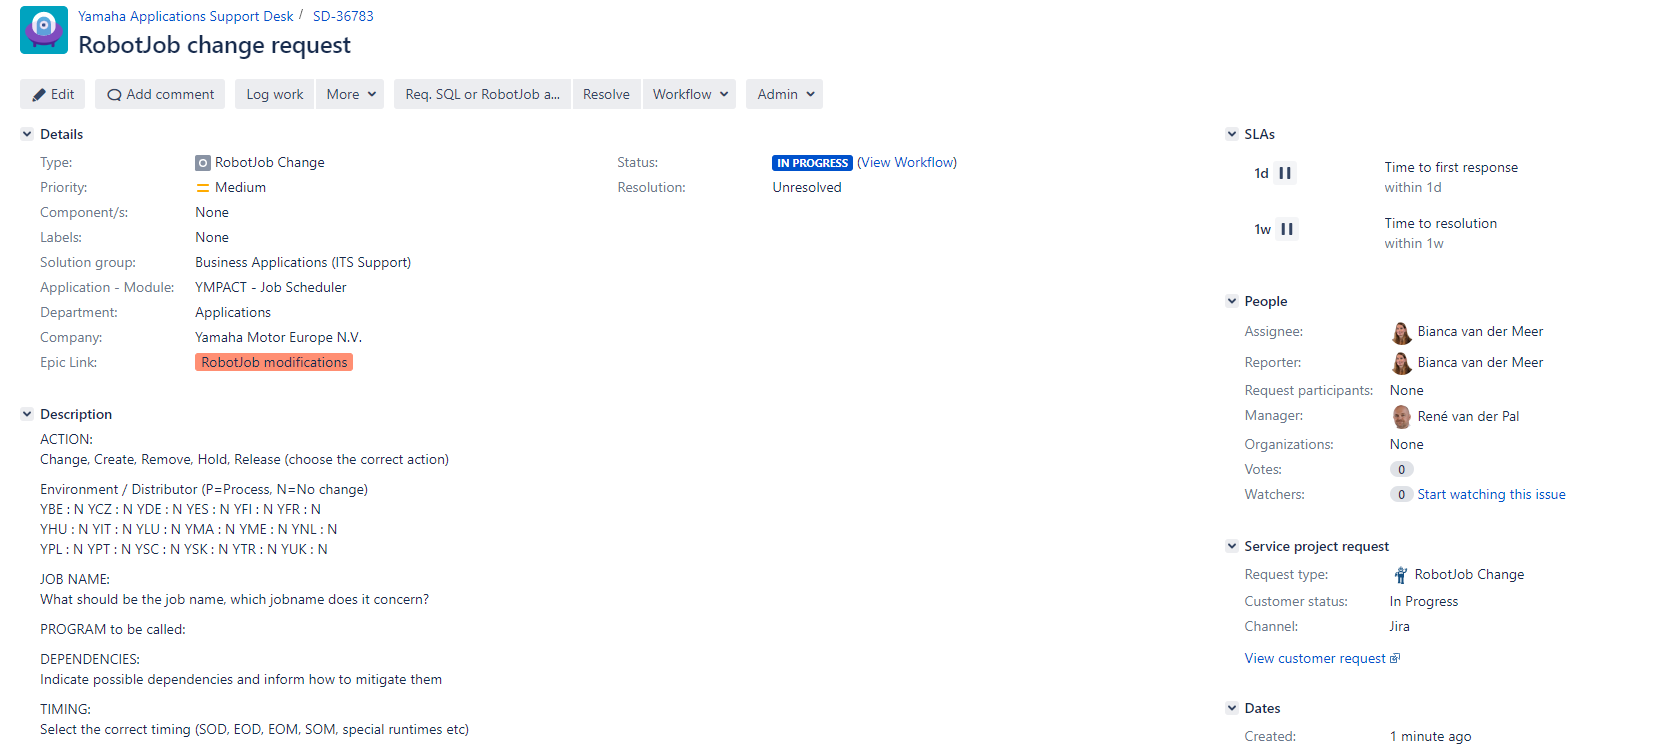
SD ticket status is updated to Pending linked Ticket Execution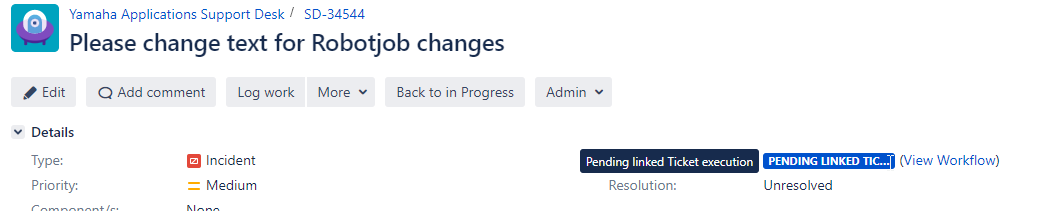
- Jump to the
...
- Robotjob ticket which can be found under Issue Links - Is implemented by section

- Complete the text in the Description area

- Make sure correct Solution group is set:
Business Applications (ITS Support) or Logistics Applications - Make sure correct Yamaha Team is set
- Select correct Application- Module
If module cannot be specified for SYS200/YLS this can be left blank


- Press Req. SQL or RobotJob approval

- Add a comment if needed, and press Req. SQL or
...
- Robotjob approval
If a Robotjob change has already been applied then Retrospective approval? flag Yes need to be selected. Else this can be left empty.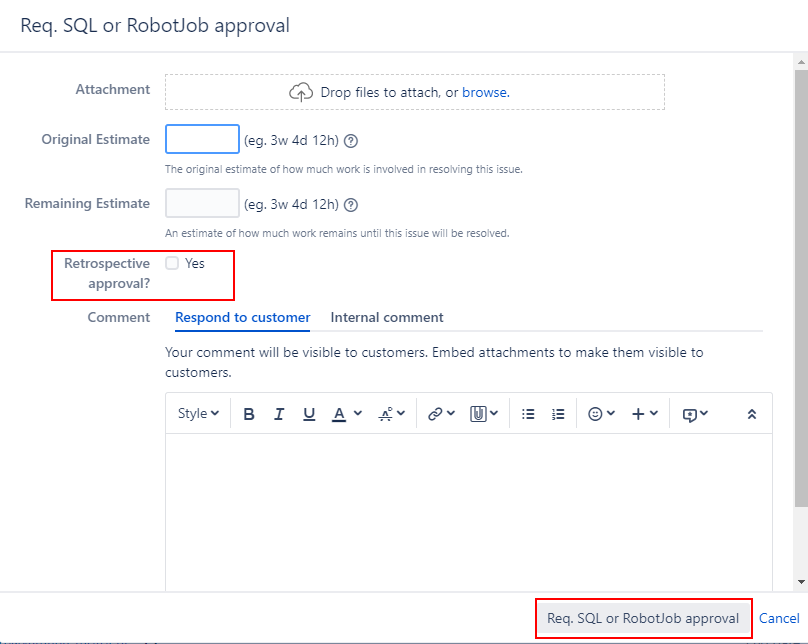
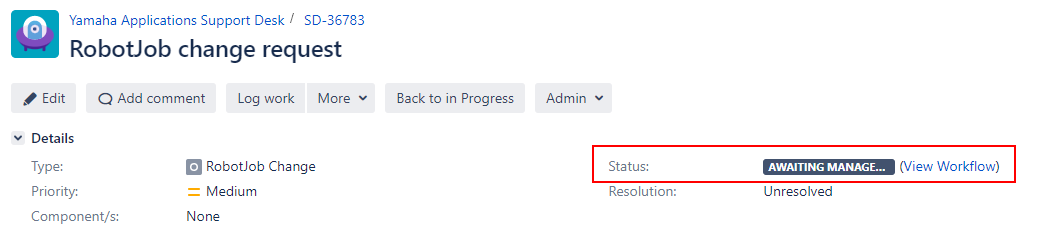
- The original ticket is updated to status: Awaiting RobotJob approval.
This invokes an approval request which is similar as an SQL approval
...
- , ticket status will be changed to Awaiting manager approval
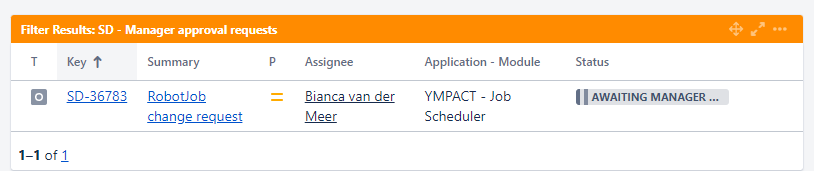
- Approver will see the approval request via filter on dashboard:
- The approver should select
...
- Approve Robot Job if approved

- If Retrospective approval has been requested the flag will be set:
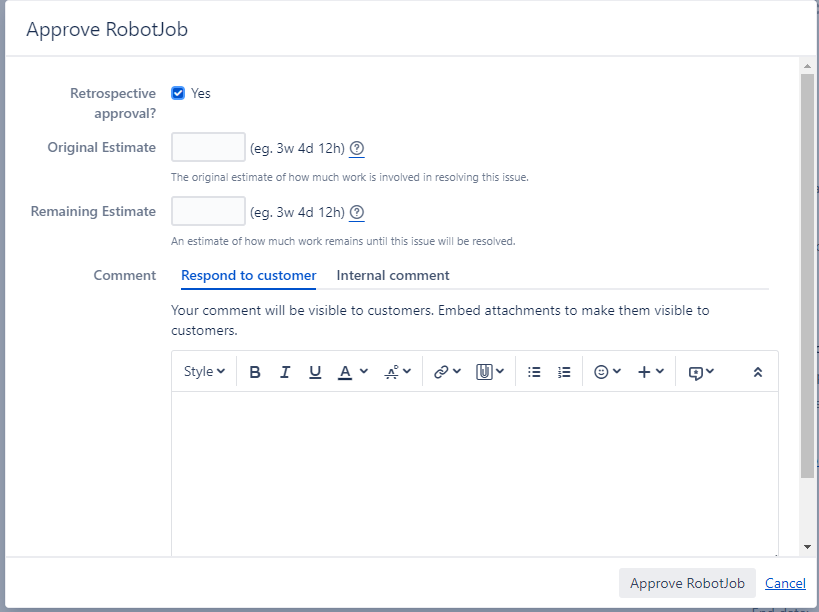
- If Retrospective approval has been requested the flag will be set:
- If not approved, the approver adds a comment to the ticket, selects Workflow and Back in Progress
Assignee repeats from step 5 or closes the issue with resolution Canceled.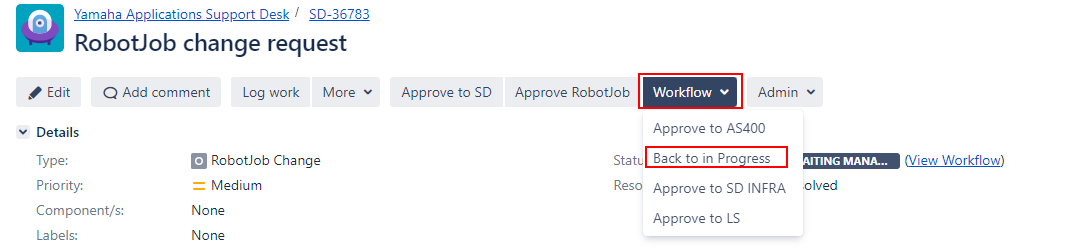
- Approve Robot Job if approved
- For Normal approval the ticket changes to status Awaiting Execution

Automatically the following comment is added:
- For Retrospective approval the ticket will automatically closed and Step 14 and 15 will be skipped

Automatically the following comment is added including the approvers name:
- For Normal approval the ticket changes to status Awaiting Execution
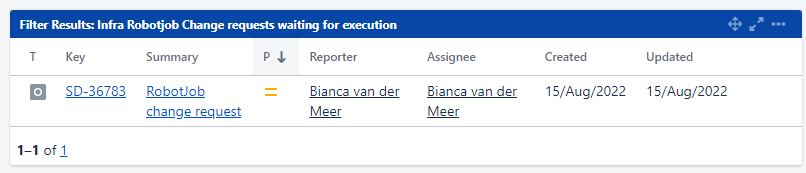
- Ticket will appear in filter results
- For Ympact: on Infra AS400 dashboard: Infra Robotjob Change requests waiting for execution
- for YLS/SYS2000 on Project management Logistics dashboard: Logistics Applications Robotjob Change requests waiting for execution

- For Ympact: on Infra AS400 dashboard: Infra Robotjob Change requests waiting for execution
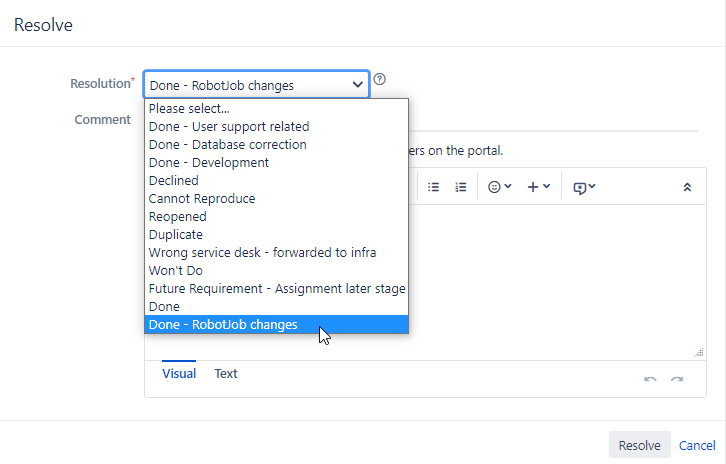
- When done, close the ticket via the Resolve button, select resolution Done- Robotjob changes and then Resolve
For Ympact this is done by INFRA AS-400 support for Logistics applications support is is done by the person who has completed the RobotJob Change request.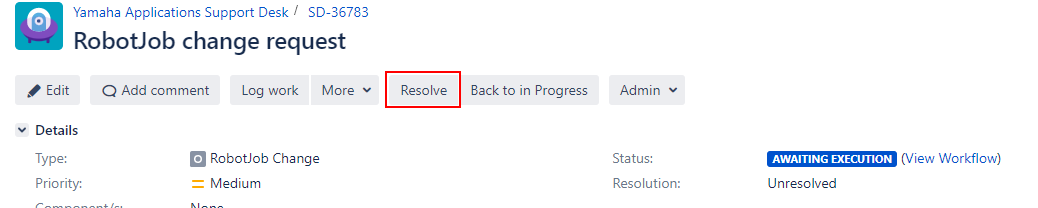

- Automatically the original (source) ticket is updated to status in
...
- Progress , via Issue links it is visible that the linked ticket is closed.

New Robotjob ticket via Create button (non-preferred)
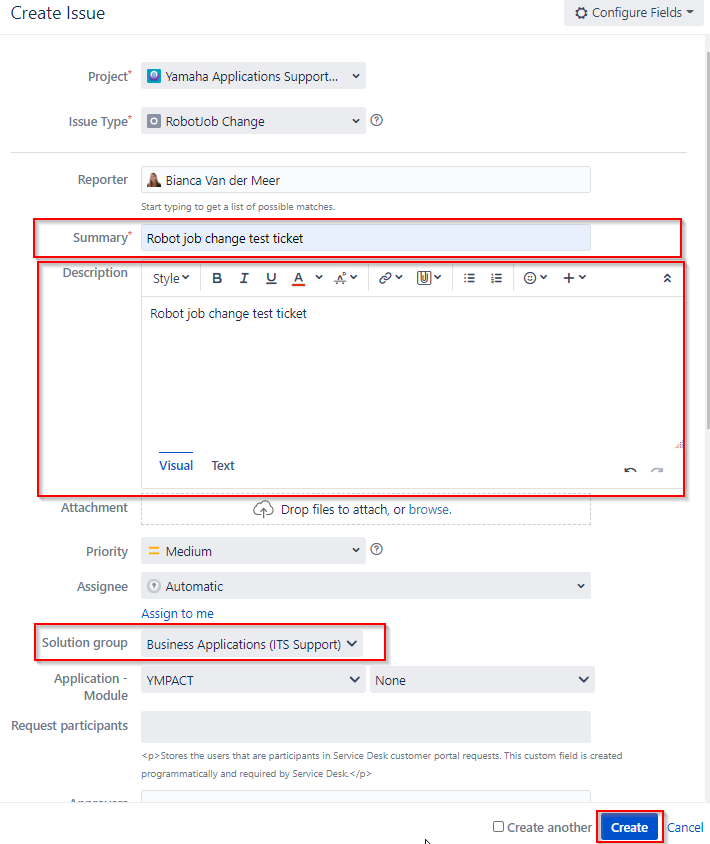
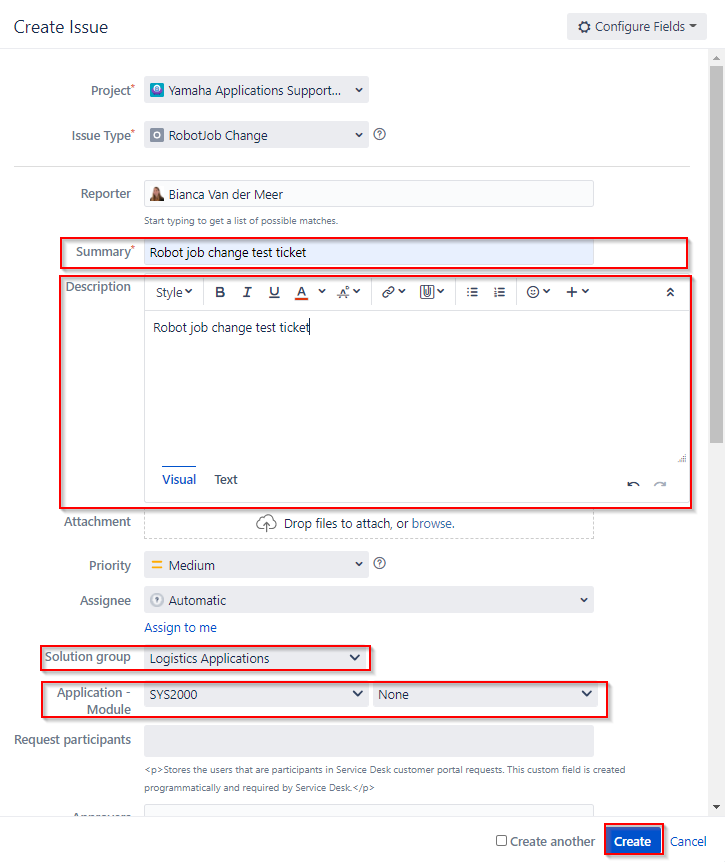
- Via Create button, select Issue Type RobotJob Change
Note: This option is only available for users who are member of licensed group: YMEUACJiraServiceDeskUsers.
- A new screen will be opened where you can enter the ticket details:
- Add text to the Summary, Description fields
- Select Solution group: Business Applications (ITS Support) or Logistics support
- Select Application Module:
- Select correct Team Yamaha
- If available include screenshots/attachments to the ticket
- Press Create button
- The requester will receive a notification per mail with the ticket number or check the Queue for open tickets.
Open the newly created for Type Robot Job Change ticket
- Allocate the ticket to yourself
- Click on the Allocate button

- select Assign to me

b. Click on the Allocate button in the Allocate screen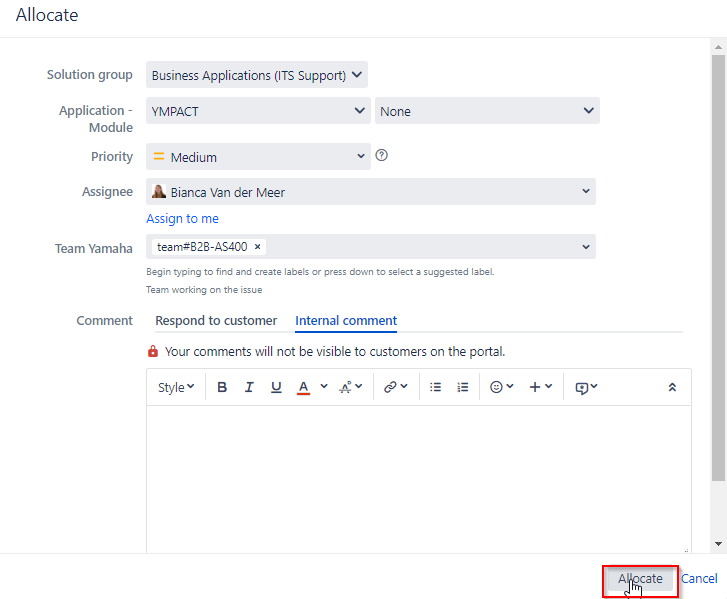
- Click on the Allocate button
- Click on Start Progress

- Complete the text in the Description area. Describe manually the change required for the RobotJob. There is no template text available when creating a ticket manually.
Below text can be used to copy-paste it in the description field.ACTION:
Change, Create, Remove, Hold, Release (choose the correct action)Environment / Distributor (P=Process, N=No change)
YBE : N YCZ : N YDE : N YES : N YFI : N YFR : N
YHU : N YIT : N YLU : N YMA : N YME : N YNL : N
YPL : N YPT : N YSC : N YSK : N YTR : N YUK : NJOB NAME:
What should be the job name, which jobname does it concern?PROGRAM to be called:
DEPENDENCIES:
Indicate possible dependencies and inform how to mitigate themTIMING:
Select the correct timing (SOD, EOD, EOM, SOM, special runtimes etc) - Press Req. SQL or RobotJob approval
- Add a comment if needed, and press Req. SQL or Robotjob approval
If a Robotjob change has already been applied then Retrospective approval? flag Yes need to be selected. Else this can be left empty.
- The original ticket is updated to status: Awaiting RobotJob approval.
This invokes an approval request which is similar as an SQL approval, ticket status will be changed to Awaiting manager approval - Approver will see the approval request via filter on dashboard:
- The approver should select Approve Robot Job if approved
- If Retrospective approval has been requested the flag will be set:
- If Retrospective approval has been requested the flag will be set:
- If not approved, the approver adds a comment to the ticket, selects Workflow and Back in Progress
Assignee repeats from step 5 or closes the issue with resolution Canceled.
- The approver should select Approve Robot Job if approved
- For Normal approval the ticket changes to status Awaiting Execution
Automatically the following comment is added: - For Retrospective approval the ticket will automatically closed and Step 12 and 13 will be skipped
Automatically the following comment is added including the approvers name:
- For Normal approval the ticket changes to status Awaiting Execution
- Ticket will appear in filter results
- For Ympact: on Infra AS400 dashboard: Infra Robotjob Change requests waiting for execution
- for YLS/SYS2000 on Project management Logistics dashboard: Logistics Applications Robotjob Change requests waiting for execution
- For Ympact: on Infra AS400 dashboard: Infra Robotjob Change requests waiting for execution
- When done, close the ticket via the Resolve button, select resolution Done- Robotjob changes and then Resolve
For Ympact this is done by INFRA AS-400 support for Logistics applications support is is done by the person who has completed the RobotJob Change request.
Overview
Content Tools