Table of Contents
Introduction
Welcome to the Confluence Basic Training page, designed to help you quickly get up to speed with Confluence Data Center Environment.
Confluence is a collaboration wiki tool used to help teams to collaborate and share knowledge efficiently. Dynamic pages gives a team a place to create, capture, and collaborate on any project or idea.
This page will serve as your starting point for:
- Navigating spaces and content hierarchies efficiently
Learning the basics of page creation, formatting, and structuring
Applying permissions and restrictions appropriately
Leveraging collaboration features such as comments, mentions, and inline discussions
Whether you’re a new contributor, a space administrator, or part of a team, this training reference will help you work productively and maintain the quality and consistency of our knowledge base.
Looking for more training material? Visit the Atlassian Confluence Data Center documentation.
Confluence access, permissions and restrictions
Access to Confluence spaces, pages, and administrative features is controlled through a combination of Global Permissions, Space permissions , and Page restrictions.
These settings ensure that only authorized users and groups can view, edit, or manage content, safeguarding sensitive information and maintaining compliance with organizational security policies.
To promote consistency and simplify management, permissions and restrictions should be assigned through user groups rather than at the individual user level.
Global Permissions are managed by an Atlassian Administrator.
Space Permissions / Page Restrictions are managed by an Atlassian Administrator and/or Space Administrator.
If you or a colleague require access to a YME Confluence space or page, please submit an Application Access request form.
Confluence Site navigation
Use the site navigation menu to find people, pages, and apps no matter where you are in your Confluence site: 
- Tap Home or the Confluence logo ( ) to return to your Confluence dashboard. Tap Recent to see a list of pages and blog posts you’ve visited or worked on, plus drafts and starred content.
- Tap Spaces to move between your starred or recently visited spaces, or to access the space directory.
- Tap People to visit the people directory, where you can find information about the people you work with and create teams.
- Tap Apps to see a list of the apps that are installed on your site or visit an app’s dashboard.
- Tap Create to create a new page from anywhere on your site.
In addition, you can:
- Search for content in the search bar
- Tap the 9-dot icon (
 ) to switch to another Atlassian app
 - Tap the bell icon (
 ) to see notifications for your Atlassian apps
 - Tap (
 ) to get help, see what’s new, view keyboard shortcuts, and more
 - Tap your avatar to provide feedback, edit your profile, and change your settings
Starred spaces appear at the top of your Home dashboard for easy access. To star a space, go to the Spaces >Space Directory and tap Star this space in the top right.
Navigating within a space
Use the space sidebar to navigate within a space. The space sidebar appears to the left of the page you’re viewing. It has three parts, each specific to the space you’re in.
The name of the space appears at the top of the space sidebar, followed by links to the space overview, blog, and space settings, plus dashboards for any apps you have installed.
Below these items, you’ll find your space shortcuts. These are links to important pages or websites that people who use the space need to be able to find easily. You can add shortcuts to pages in the space, in other spaces, or even on external websites.
Finally, there’s the content in the space.
Pages are organized and displayed hierarchically in the page tree. To see the children of any page in the space, tap > next to the page name. Confluence automatically displays the children of the page you’re viewing.

Tap [ to show or hide the sidebar while you’re viewing a page.
To reorder pages within a space, just drag and drop; this should only be done by Confluence administrators and Space admins to prevent pages getting lost and links not working anymore.
Exploring your Home dashboard
Home makes it easy to explore your recent spaces and pages and stay updated on what’s happening in your organization.
To the right of your dashboard, you’ll find site-wide announcements, calendars, and your site’s activity feed.
The activity feed is a treasure trove of recent and popular content across your site. These are pages and blog posts that other people in your company have liked or commented on. These updates can help you keep tabs on what’s going on across your company and gauge how your company culture is doing.

The more likes and comments a page gets in a short period of time, the higher it will rank in the popular activity feed.
Search
Wherever your travels take you in Confluence , you should be able to find what you need.
Use the search bar in the upper right  to look for pages, blog posts, spaces, and even people. Results will begin to show up as soon as you start typing.
If you get to many results you can filter them by space, contributors, content type, and more.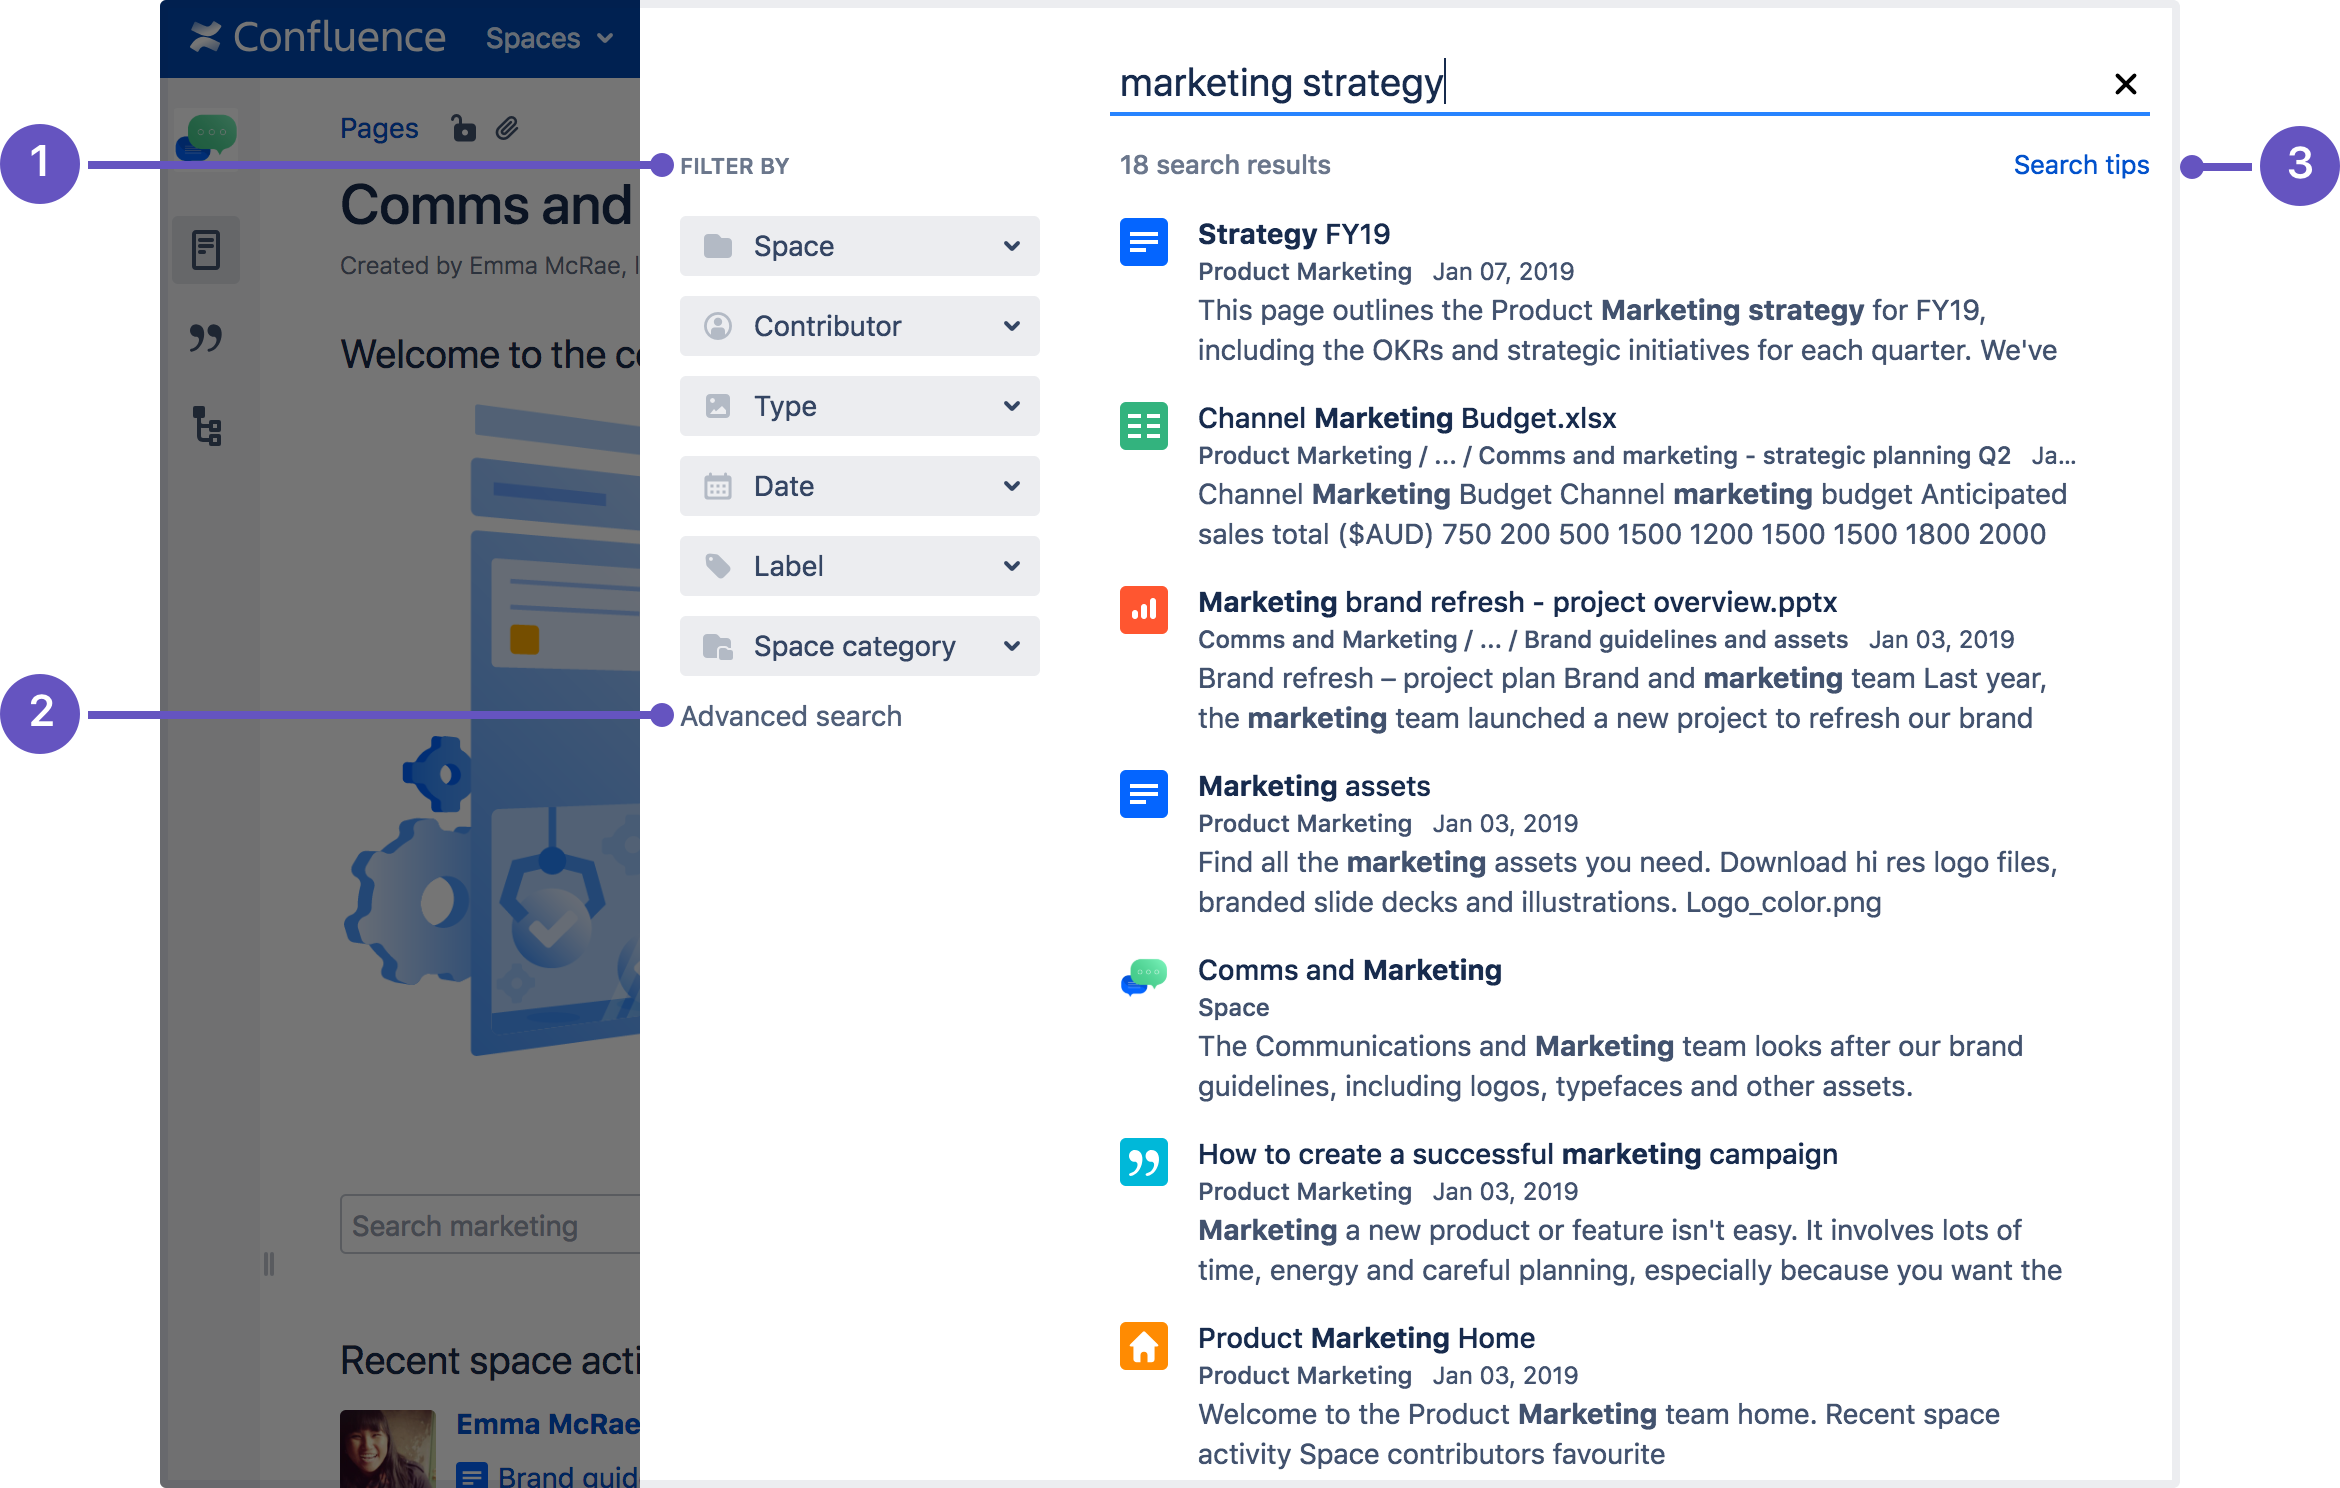
- Search filters – refine your results by space, contributor, type, date, label, or space category.
- Advanced search – go the the advanced search page.
- Search tips – get search help, and tips for refining your search.
Search for exact matches
To find a page that contains an exact phrase, use double quotes around your search phase.
For example, searching for "product manager" in double quotes will show search results with that exact match. Results will not contain pages that have only 'product' or only 'manager.'
Search with operators
If you don't know the exact phrase you're looking for, enter keywords and operators in the search field. The available operators are OR, AND, NOT, and Group.
- OR search: searching for 'marketing' OR 'digital' will show results that contain one of these terms.
- AND search: searching for 'marketing' AND 'digital' will show results that contain both of these terms.
- NOT search: searching for 'marketing' NOT 'digital' will show results that only contain 'marketing' and do not contain 'digital.'
- Group search: searching for (marketing OR digital) AND content will show results that can contain either 'marketing' or 'digital,' but must contain 'content.'
Search with wildcards
A wildcard is a character like ? or * that can be used to replace characters in your search. To replace a single character, use ?. To replace multiple characters, use *.
- For example, a search of b?g will show pages that have any of the following words: big, bug, bag, beg, or bog.
- A search of manag* will show pages that have words such as: manage, manager, management, managing, managerial, etc.
Here's something valuable to know: You can combine exact matches, operators, and wildcards in one search query. For example, you can search manag* AND past? AND ("article" OR "post")
So searching on *amaha wont find Yamaha…. But searching on yamah* will find Yamaha.
There is a workaround however if you use /.*amaha.*/ it will find Yamaha.
More detailed information regarding the search option can be found on the following Atlassian page: Search
Keyboard shortcuts
Within Confluence, you can access the complete list of keyboard shortcuts. There are three ways to access this list:
Use the keyboard command: When viewing a page, press shift and ? together?
Use the main navigation bar: At the top right of your screen, select the ? icon, then Keyboard shortcuts
Scroll to the bottom of any page: In edit mode, scroll to the bottom and select the ? icon
Pages and blogs
Create a page
You can create a page from anywhere in Confluence; just select Create in the header and you're ready to go.
Pages are the place to capture all your important (and unimportant) information; start with a blank page and add rich text, tasks, images, macros and links, or use one of the useful blueprints to capture meeting notes, decisions, and more.
If you want to quickly create a blank page, hit the Create button in the header; if you want to create a page from a template, hit the Create from template button.

- Create blank page
- Create from template

- Select space: choose the space where you'll create the content.
- Page templates: create a page from a template or create other types of content.
- Parent page: your page will be a child of this page.
Once you decide on a blank page or blueprint, you'll be taken straight into the Confluence editor. The editor is where you'll name or rename your page, add the content, and format it to look great.
Move and Reorder Pages
You can also organize pages in a hierarchy, with child and/or parent pages for closely related content.
When you navigate to a Confluence page and select the Create button in the header, the page you're creating will by default be a child of the page you're viewing.
Have as many child pages and levels in the hierarchy as you need to, and move pages or reorder if you want to change their location.
Before move or reorder a page be aware of the permissions that are required for this and that you have permissions for both locations to be able to move or reorder a page to a new location.
All Confluence Space restrictions are set by a Confluence Administrator or a Space admin, preferably by using groups.
For YME Confluence Spaces deletion of pages is restricted to Confluence Administrators or Space admins/ Security group members. Users are only allowed to delete their own created pages.
Confluence Editor
The Confluence editor is what you'll use to create and edit Confluence pages, blog posts, and comments. You can enter content as you would in a Word document, apply formatting, and embed other content and files on the page.
Below some editing functionalities are highlighted, for more instructions visit Atlassian site: The Editor
Edit a page
After you save you'll see the page in a “view” mode. You can re-enter the editor any time by selecting Edit or pressing E on your keyboard.
To edit a page, you need the 'Add Pages' permission for the space.
To keep track of your changes over time, you can publish the page with a version comment. When you are done editing, enter your comment in the What did you change? field in the lower-left corner of the screen, and then select Save.

Edit a page together
Need input from your team members? Multiple people can edit your page at the same time.
Hit the Invite button in the editor and either grab the link, or enter some people or groups to invite by email (they need the appropriate Confluence and space permissions of course).
See Collaborative editing for all the ins and outs.
Due to performance issues Collaborative Editing in YME Confluence has been turned off.
Import a Word Document into Confluence
The Office Connector allows you to import Word documents and create one or more Confluence pages from the content.
You can create a single page, or divide the contents up into multiple pages, based on the headings in your document.
This is useful if you have a lot of content stored in existing documents, or if you are migrating from another system or platform that allows you to export to Word format.
Also read information about The View File macro, this allows you to embed an Office or PDF document on a page in view only mode.
To import a Word document in Confluence:
- Create a page in Confluence or go to an existing page (you want to view the page, not edit it).
- Choose
 > Import Word Document
 - Choose Browse and locate the Word document you want to import, then choose Next.
The import document options appear. - Enter a title for the new page (useful if you don't want to use the file name as your page title).
- Choose where you want to import the file (as a brand new page, or overwriting an existing page with the same title).
- Choose how to handle title conflicts (rename the new pages or replace existing pages).
- Choose whether to create a single page or multiple pages based on the heading styles in the file (this option is only available if the file contains heading styles).
- Click Import.
When the upload has finished, pages will be created with the content of the Word documents. You can then view and edit this page as normal. There's no connection between the original Word document and this page.
Limitation: In order to prevent out of memory errors, we limit the uncompressed size of the file you can import to 20 MB.
More more information about Word document import read the following Atlassian page: Import a Word Document into Confluence
Video instructions (Video is in German, but the screenshots are clear).: https://www.youtube.com/watch?v=QUB9lB9EtA
Page comments and inline comments
Add page comments
One way to use comments is to add a comment to an entire page. Here's how:
- Go to the Confluence page you want to comment.
- Scroll to the bottom of the page
- Type a comment in the comment field
- Select Save
When you comment on a page, you will automatically start 'watching' that page. That means you'll receive email notifications when others add comments or changes to the page are made. Your teammates can reply to or 'like' your page comments. If they do, you'll be notified.
Add inline comments
You can also add comments within the page, inline on any text. Inline comments can be added when you are either editing or viewing a page. Here's how to add an inline comment:
- Highlight the text you'd like to comment on
- Click the comment icon that appears above the highlighted text
- Type your comment and select Save
After you save your comment, the text on the page will be highlighted in yellow. To view comments, click any yellow highlighted text on the page. Just like page comments, your teammates can reply to or 'like' your inline comments.
Macro's
Macros are how you supercharge your Confluence pages.
You can use macros to:
- change the format and layout of your page
- display media like video, audio, and social media content
- collate and organize Confluence pages, blogs, and files
- perform actions from a page, such as creating a page from a template.
Take your Confluence space to the next level using macros.
Below you find some useful macro's for Page editing.
Macro basics
Add a macro to your page
To add a macro to your page:
From the editor toolbar, select Insert
 , then Other Macros.
- Select a macro from the list.
- Enter any required parameters.
- Choose Insert.
In the editor you'll see a placeholder that represents the macro. Once you publish your page, you'll see the macro in its full glory.
Edit a macro
Macro parameters are used to change the behavior of a macro.
To change the macro parameters:
- In the editor, click the macro placeholder and select Edit.
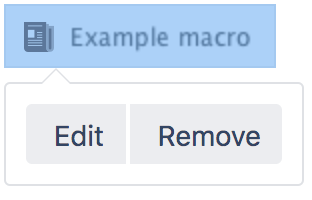
- Update the parameters as required then select Insert.
Head to the documentation for specific macros of Atlassian to view full details of the parameters available in each macro.
Some Macros have been highlighted below:
Macro highlighted
Table of Contents and Content Zone Macro
The Table of Contents macro scans the headings on the current Confluence page to create a table of contents based on those headings or selected zone.
This helps readers find their way around lengthy pages, by summarizing the content structure and providing links to headings.
Step-by-step guide Add Table of Contents:
- From the editor toolbar, choose Insert > Other Macros.
- Choose Table of Contents from the Confluence content category.
- Use the parameters below to specify which pages to display.
- Choose Insert.
You can then publish your page to see the macro in action.
More detailed information regarding Table of contents can be found on the following links:
Children Display Macro
Add the Children Display macro to a page to display a list of pages from a specific part of the page hierarchy. You can choose to display pages that are a child of the current page, or a child of any other page in a space.
This macro is great for providing quick access to:
- pages related to a project
- procedures and how-to pages.
Because it relies on the page hierarchy, the list of pages is automatically updated when pages are added, deleted, or moved. You can even show an excerpt from the page for extra context.
Step-by-step guide: Add the Children Display macro to your page
To add the Children Display macro to a page:
From the editor toolbar, choose Insert
> Other Macros.- Choose Children Display from the Confluence content or Navigation category.
- Use the parameters below to specify which pages to display, and how you want them to look.
- Choose Insert.
You can then publish your page to see the macro in action.
More detailed information regarding Table of Children's Display can be found on the following link: Children Display Macro
Code Block Macro
The Code Block macro is an essential tool for presenting technical content clearly and consistently.
It allows you to display code, configuration snippets, or command-line examples in a way that preserves formatting, improves readability, and prevents accidental formatting changes by Confluence’s rich-text editor.
It will also prevent you from not being able to save a page if a code block is not used for saving code on a page or a page breakage.
Add a Code Block macro to your page to display code examples with syntax highlighting.
This is great for sharing code snippets such as:
- sample code
- terminal commands
- excerpts from application logs.
Add the Code Block macro to your page
To add the Code Block macro to a page:
From the editor toolbar, choose Insert
> Other Macros.- Choose Code Block from the Formatting category.
- Choose a language for syntax highlighting.
- Use the parameters below to customise how the code block should appear on your page.
- Choose Insert.
- Type or paste your code into the macro placeholder.
You can then publish your page to see the macro in action.
More information can be found on the following Atlassian page; Code Block Macro
View File Macro (Embed an Office or PDF document)
The View File macros allow you to embed an Office or PDF document on a page.
First attach the document to a page and then use one of the View File macros to display the document's content.
- Create a page in Confluence or go to an existing page (you want to view the page, not edit it)
- Go to Insert > Files and images and upload a file or drag the file directly onto the page
You can attach multiple files at a time. - Save the page by selecting the Publish button
- Open the page again and select Edit mode
- Remove the file
- From the editor toolbar, choose Insert
 > Other Macros
 - Select the format of the file (Office Word, Office Excel, Office Powerpoint, PDF etc)
The recently uploaded file will be selected automatically. - Select Insert
- Save the page by using the Update button
When opening the page in viewing mode you can now see the content of the page. For editing the file must be downloaded and can be saved to upload the latest version.
Supported file types
To display an Office or PDF document in a page, use one of the following View File macros in the macro browser:
- Office Excel (.
xlsand .xlsx) - Office PowerPoint (.
pptand .pptx) - Office Word (.
docand .docx) - PDF (
.pdf)
Apps
Confluence supports a wide range of apps (also called add-ons or plugins) that extend its core functionality, enabling enhanced collaboration, automation, reporting, design customization, and integration with other tools.
In YME Confluence environment, apps are installed and maintained centrally by Atlassian Administrators to ensure compatibility, performance, and security.
Draw IO
Draw.io app for Confluence is used to create powerful, easy to use and secure diagrams and whiteboards.
You can use draw.io to visualize everything:
- Process Modeling and Relationships (BPMN 2.0, ERD, Flowcharts, Swimlane diagrams…)
- Software Development and Networks (UML, UML 2.5, AWS, Azure, Cisco, GCP, IBM…)
- Administration (Org charts, Mindmaps, Floorplans, Infographics)
- AI-driven Smart Templates for all of the use cases mentioned above
- Meetings and Brainstormings (with our simplified whiteboard editor)
- And many more
Documentation can be found on the Vendor website: Getting Started with draw.io for Confluence
Tutorials can be found on the following site: Draw.io Tutorial
Embed Google maps Pro
Embed Google Maps Pro helps your organization and customers convey location, navigation instructions or directions on a Confluence page as per your business requirements.
This is the only macro that allows embedding from publicly accessible Google Maps without enabling HTML or IFRAME macros which can be a security risk in various environments.
Documentation can be found on the Vendor website: Welcome to Embed Google Maps Pro for Confluence
Table Filter, Charts and Spreadsheets for Confluence
This app offers a bundle of macros for managing Confluence tables, building charts, repurposing existing data of any format, and using excel-like spreadsheets.
Documentation can be found on the Vendor website: Welcome to Table Filter, Charts & Spreadsheets for Confluence!
Open API (Swagger) Editor for Confluence
Open API (Swagger) Viewer for Confluence is a macro which helps to display Open API JSON/YAML definition in Confluence page.
Documentation can be found on the Vendor website: https://elitesoftware.atlassian.net/wiki/spaces/OA/overview
Confluence Glossary
Page
A page is an editable document that communicates information.
Space
A space is a collection of related pages.
Main navigation bar
The main navigation bar is the menu at the top of your screen that stays with you wherever you go in Confluence.
![]()
The options within your navigation bars may look different than the screenshot. Navigation options can be customized based on your space settings, permissions, and team preferences.
Space overview
A space overview is the first page visitors see when they arrive at a space.
Space sidebar
On the left of your screen, the space sidebar is a collapsible menu that shows you options specific to the space you are viewing.
Page tree
Found in the space sidebar, the page tree is a way to organize pages into a hierarchical structure.
Starred pages
You can add 'stars' to your favorite (or most important) pages to make them easier to find later.

Watched pages
You can 'watch' pages to get email notifications when changes or comments are added to the page.
Share pages with teammates![]()
You'll often need to send pages to teams or individuals. The 'Share' button at the top right gives you two easy ways to share a page:
- Share by name, group, team, or email: Enter a teammate's name or email. Type a quick message. Select 'Send.'
- Copy the link: Select 'Copy link' to copy the URL. Paste the URL in an email or messaging app to share with teammates.
Overview
Content Tools