Introduction
This document describes how a robotjob (change) request can be created.
A Robotjob Ticket can be created via the following two options
- Automated: Out of an existing SD ticket (preferred)
- Manually: Via the Create button, via this way a ticket can directly be created for a RobotJob Change.
(Only to be used if there is no ticket from where you need to record a robotjob change)
New Robotjob request out of an existing ticket
- Open the ticket in the Yamaha Applications Support Desk
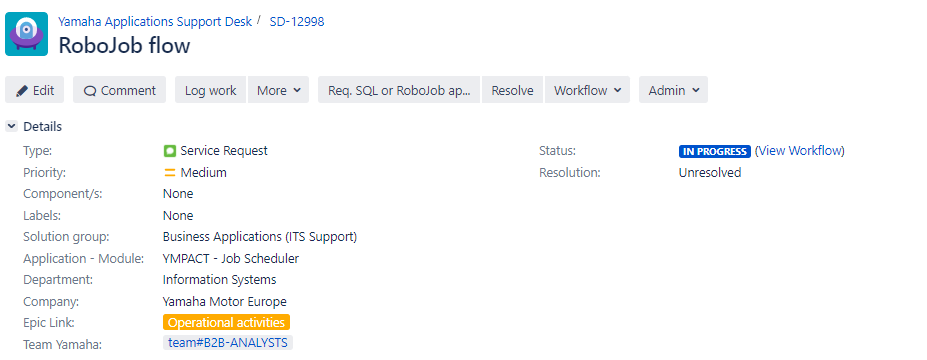
- Select Workflow , then select Create Robotjob Approval

- It immediately creates a LINKED (implemented by) new ticket until status In Progress + the reporter and assignee prefilled.
Description will be copied from the original ticket.
Press Create Robotjob Approval ticket.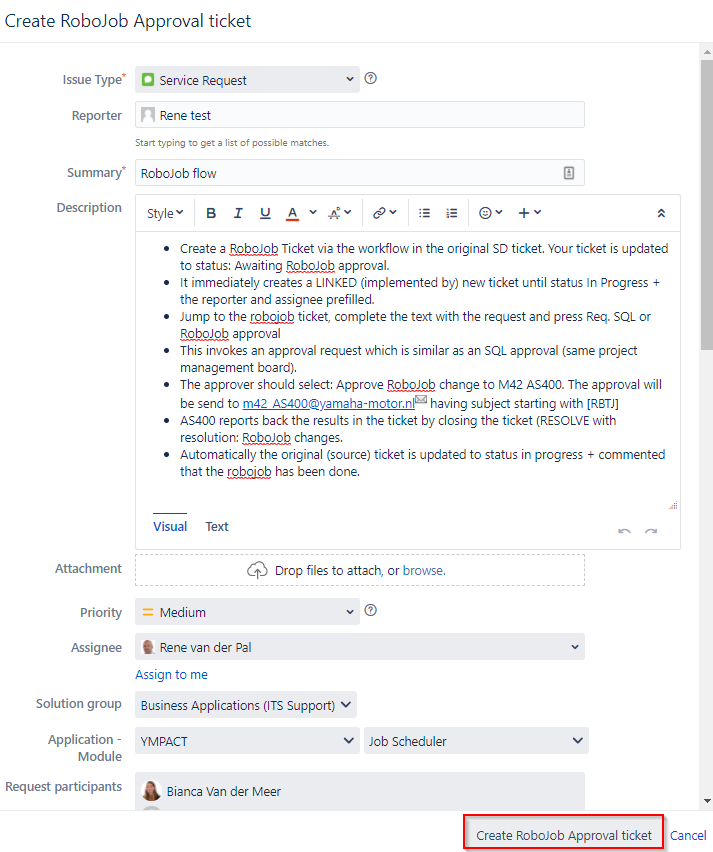
- The original ticket is updated to status: Awaiting RobotJob approval.
Jump to the robotjob ticket which can be found under Issue Links - Is implemented by section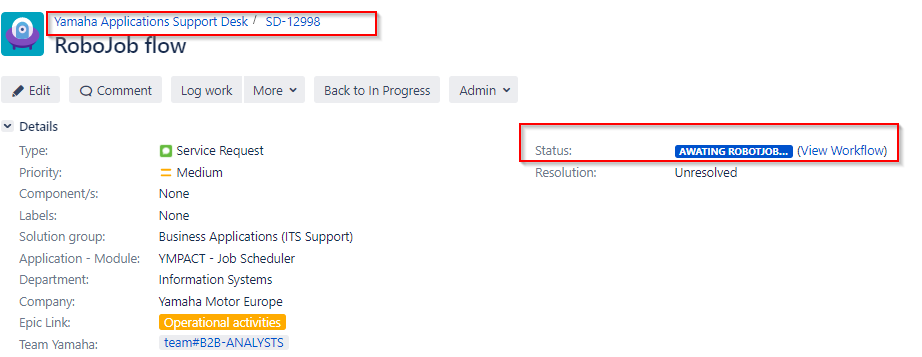
- Jump to the robotjob ticket

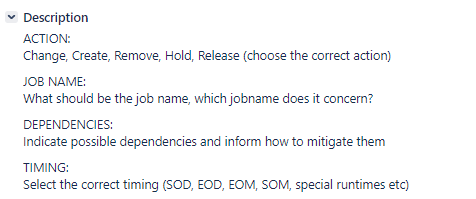
- Complete the text in the description area
- Press Req. SQL or RobotJob approval
This invokes an approval request which is similar as an SQL approval, ticket status will be changed to Awaiting manager approval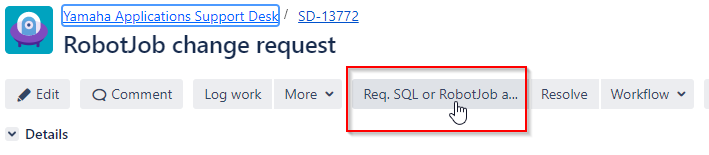
- The approver should select: Approve RobotJob change to M42 The approval will be send to m42_AS400@yamaha-motor.nl
 having subject starting with [RBTJ]
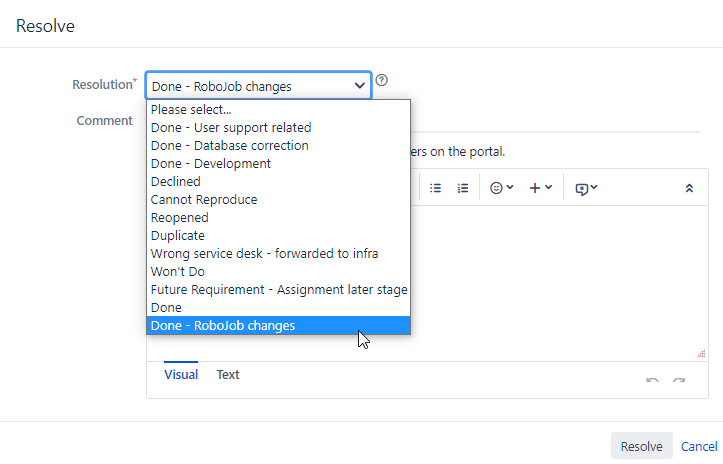
- AS400 support reports back the results manually in the ticket by leaving a comment.

- AS400 support will close the ticket via the Resolve button, select resolution Done- Robotjob changes

- Automatically the original (source) ticket is updated to status in progress + commented that the robotjob has been done.
New Robotjob ticket via Create button (non-preferred)
- Via Create button, select Issue Type RobotJob Change
Note: This option is only available for users who are member of licensed group: YMEUACJiraServiceDeskUsers.
- A new screen will be opened where you can enter the ticket details:
a. Add text to the Summary, Description fields
b. Select Solution group: Business Applications (ITS Support)
c. Select Application Module: YMPACT
d. If available include screenshots/attachments to the ticket
e. Press Create button
- The requester will receive a notification per mail with the ticket number or check the Queue for open tickets.
Open the newly created for Type Robot Job Change ticket
- Allocate the ticket to yourself
a. select assign to me
b. Click on the Allocate button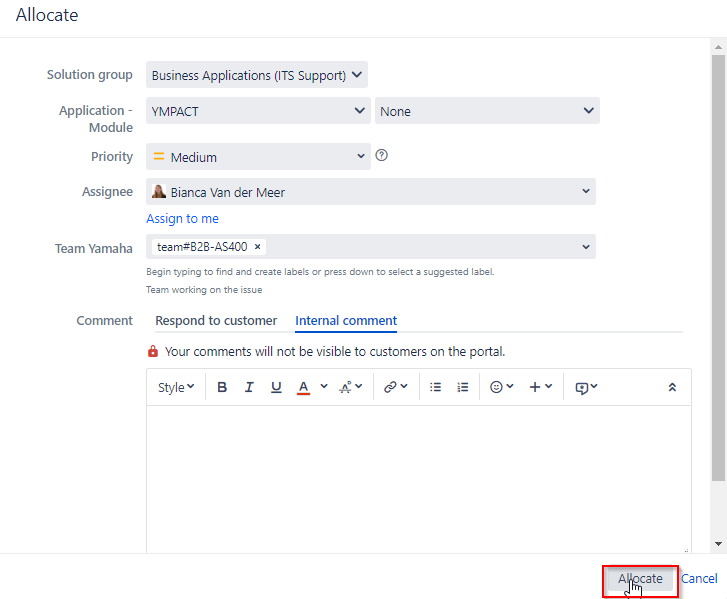
- Click on Start Progress

- Describe manually the change required for the RobotJob. There is no template text available when creating a ticket manually.
- Press Req. SQL or RobotJob approval
- Approver approves the Robotjob to M42
- AS400 support resolves the ticket by entering the results and selecting the robotjob closure reason.
Overview
Content Tools